Ambient TV Lighting
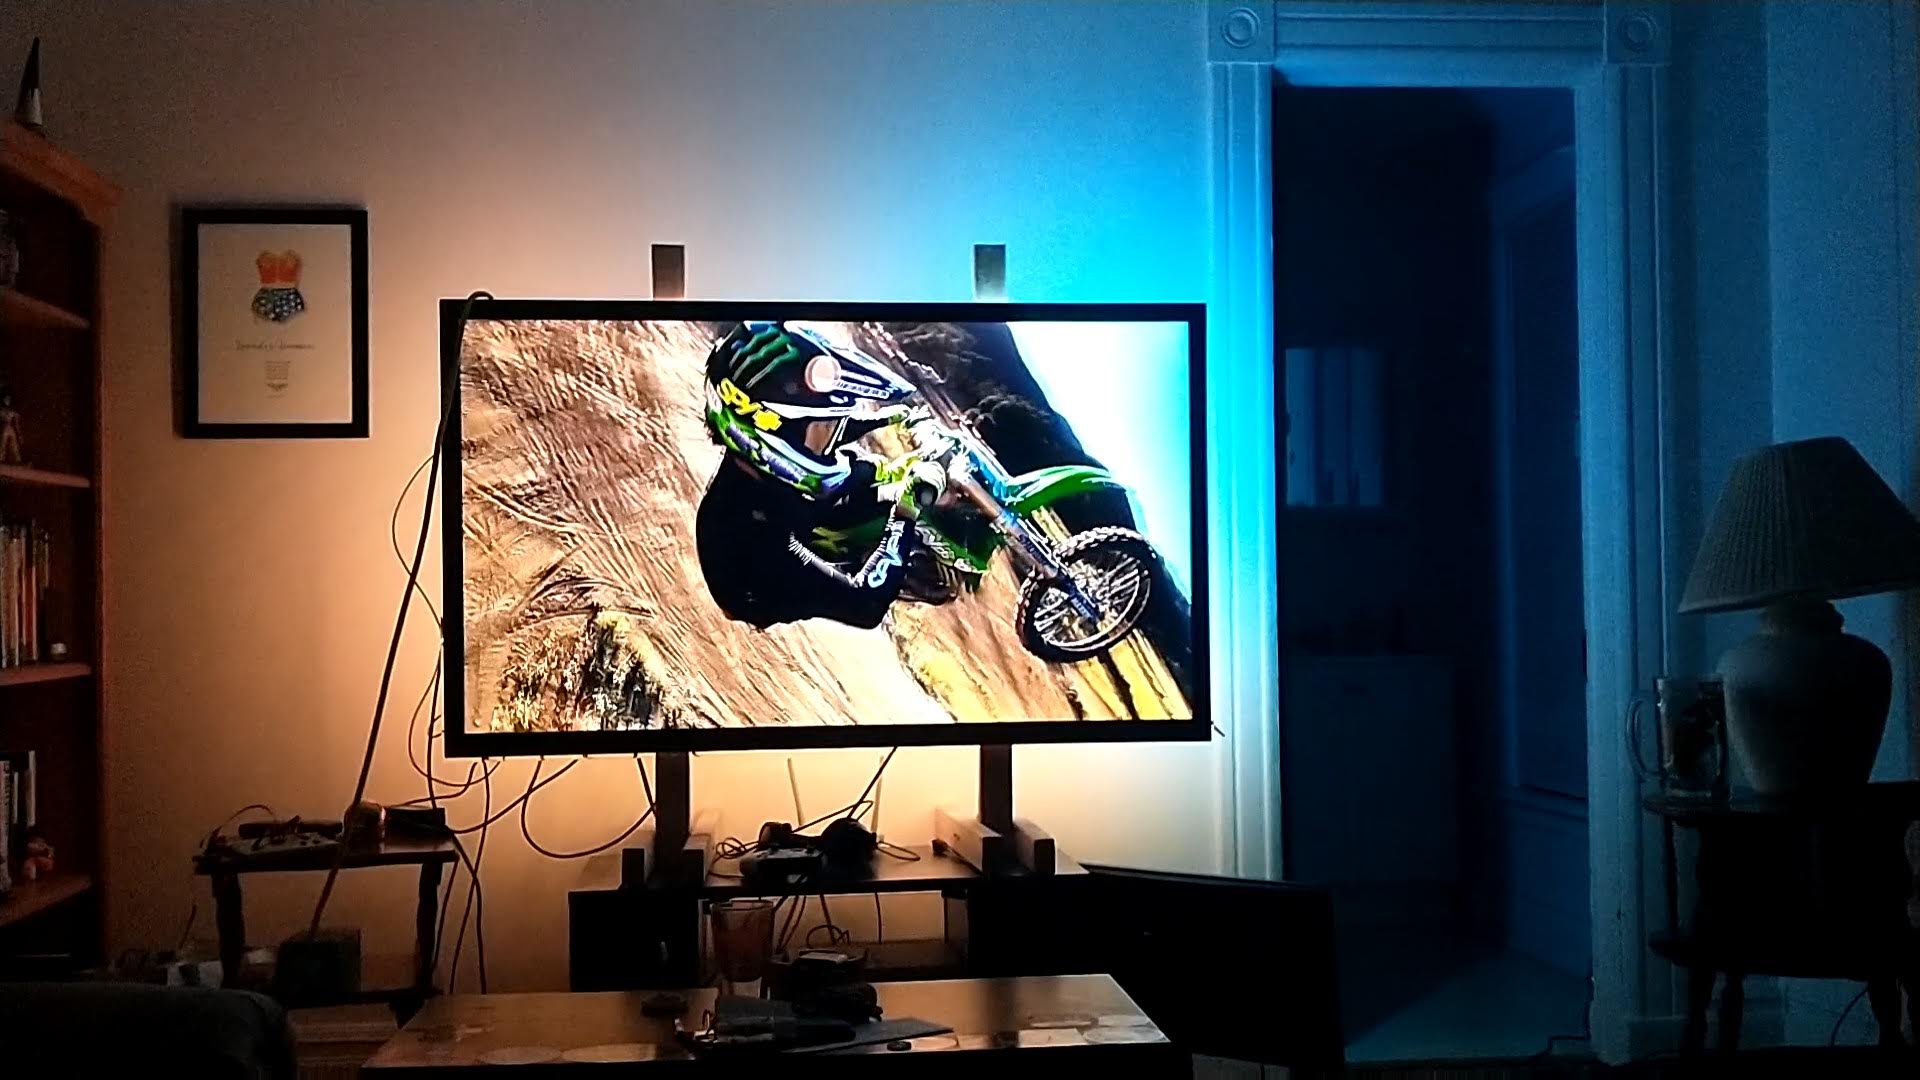
For the longest time I’ve wanted to make an ambient lighting tv setup. If you’re not sure what that is, check the pictures and videos below!

The ideal goal of this project was to use an fpga to create and HDMI pass through, and have the fpga do all the processing as well. I looked into many different fpgas, creating my own board designs with high speed HDMI serializer and deserializer chips, looking at existing boards, and ultimately decided that it didn’t make sense to go the expensive, time consuming, colossal project route instead of simply using a raspberry pi with existing software. So that’s what I did. I would very much like to come back to the fpga approach in the future if I ever find the time and appropriate hardware. (The eeColor3 is actually probably perfect for this project, though I would feel more comfortable with something further from extinction).
So for this project to work, the first order of business is choosing LED strips, and adhering them to the back of the TV. I chose the popular WS2812B. These run on 5v which make it convenient to use a single power supply for both the led strips, and the Raspberry Pi. One thing to watch out for using the 5V strips is to ensure the length of the strip, and size of the power source is measured such that that the voltage doesn’t drop towards the far end of the strip causing a color distortion. More information on this can be found online.
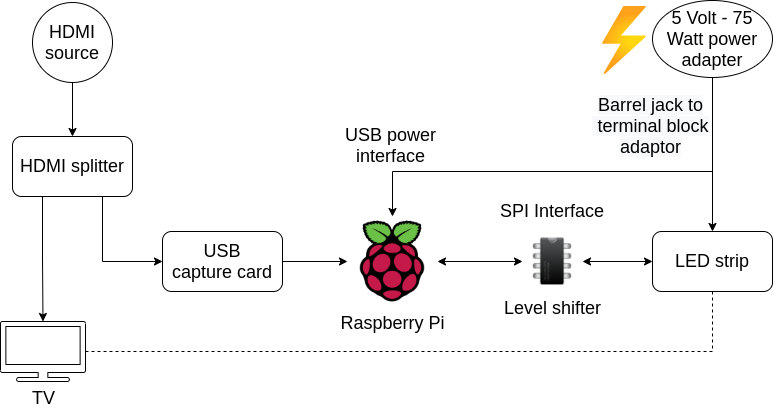
A block diagram of the connections can be seen below.

The other thing to look out for is that the Raspberry Pi needs to communicate with the led strip, but they operate on different voltages. The Raspberry Pi, even though it has a 5V power source, runs the pins on 3.3V. Thus a level shifter is used to enable the communication between the two voltages.The communication happens over an SPI interface.
The Raspberry Pi has no HDMI input to process the video. An HDMI USB capture card is used to provide an HDMI interface for the video input to the Raspberry Pi. Additionally an HDMI splitter is used to take the HDMI input source and send it to both the Raspberry Pi and TV.
The last piece needed is the software. For this I used “Hyperion.ng”. It wasn’t too difficult to set up and get running. I’ve read that a Raspberry Pi Zero W should be powerful enough to run it, but it was too slow for my setup. I used a Raspberry Pi 4 instead. One of the coolest things about hyperion is that they have an app that can be used to turn the led strips to display different patterns. It works nicely as a mood light.
I enjoy both the ambient lights for the TV stream, and also just using the strips for mood lighting. I highly recommend it!

